Master Game Feel
A Step-by-Step Guide to Creating Squash & Stretch Components in Unreal Engine 5
Learn the exact component-based workflow used in professional game development to create satisfying, responsive interactions that players love. This technique transforms static objects into living, breathing game elements.
Why Squash & Stretch?
Before diving into the implementation, let's understand why this principle is fundamental to game feel:
🎯 Instant Feedback
Players immediately understand object interactions through visual deformation
✨ Professional Polish
Transforms basic mechanics into satisfying experiences without additional assets
🔧 Component-Based
Reusable system that works across all your game objects
⚡ Lightweight
Minimal cost with maximum visual impact using just scale transforms
Setup & Initialization
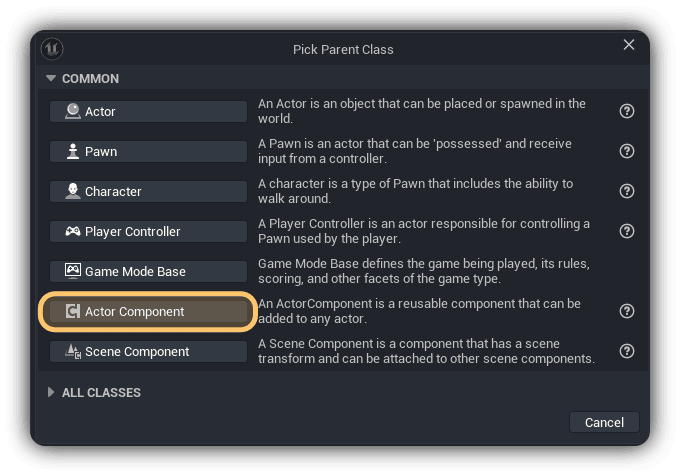
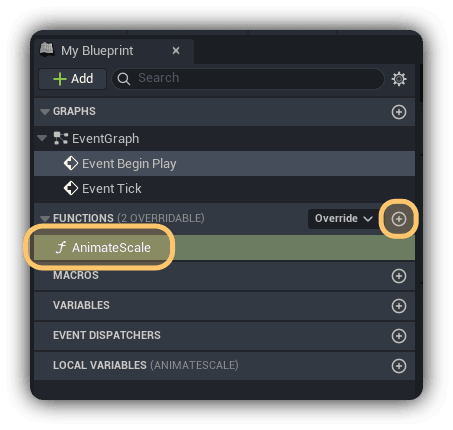
Create Component Class
We'll start by creating a reusable Actor Component that can be attached to any actor in your game. Navigate to your Content Browser and create a new Actor Component Blueprint named BPC_SquashStretch.
Set Class Defaults
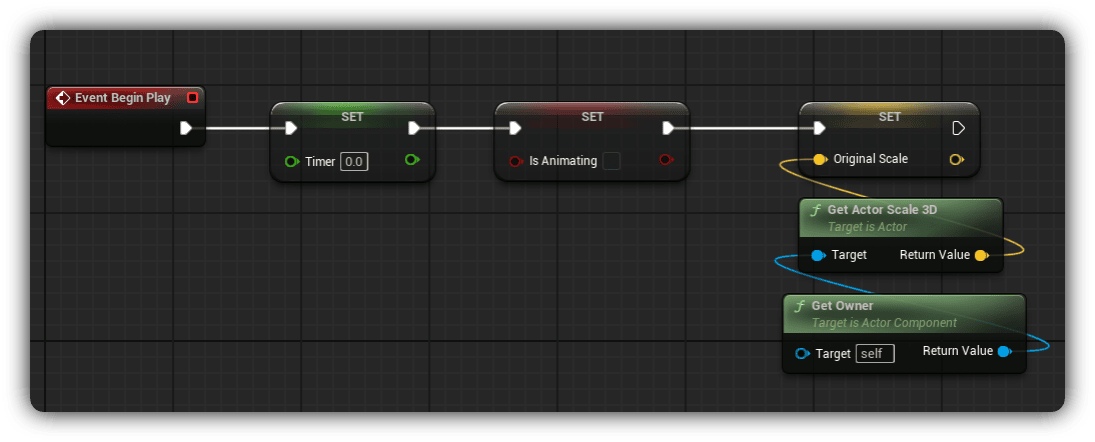
Add these essential variables to your component. These will track our animation state and store the original scale:
bIsAnimating (Boolean): Default value = false
OriginalScale (Vector3): Set via Get Actor Scale 3D → Get Owner
Create Core Function
Add a new function named AnimateScale. This will be our main animation driver, called every tick to update the scale.
Animation Logic
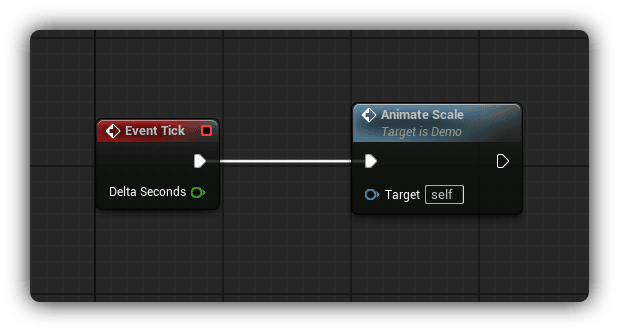
Connect to Event Tick
Call AnimateScale from Event Tick. The boolean check we'll add prevents expensive operations when not animating, keeping performance optimal.
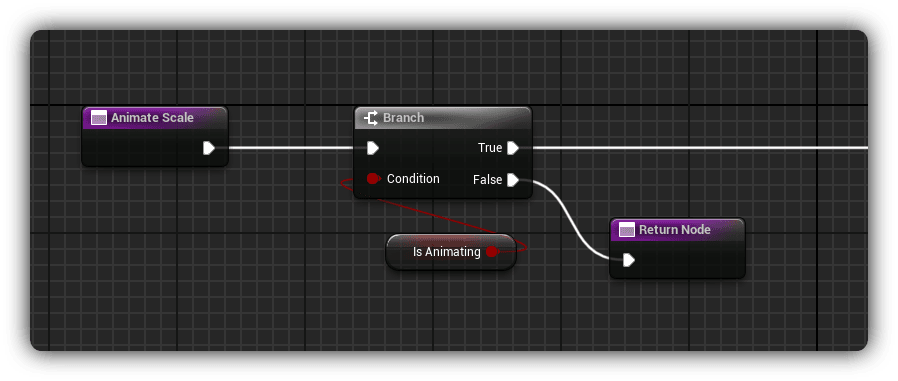
Add Animation Gate
From AnimateScale, add a Branch node with bIsAnimating as the condition. This ensures we only process animation logic when needed.
// False path → Return Node (exit early)
// True path → Continue animation processing
Squash Phase Implementation
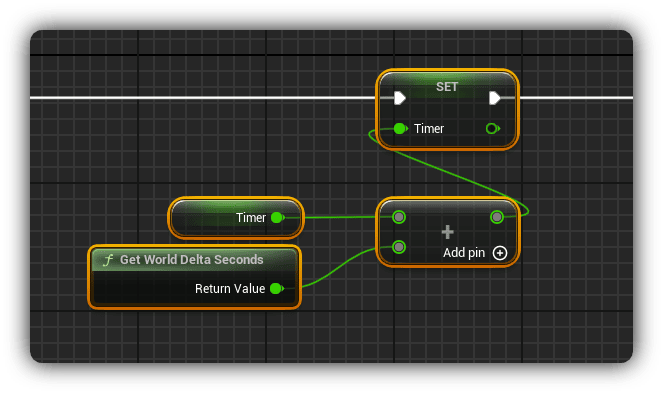
Update Timer
Increment our timer by the frame's delta time to track animation progress:
Configure Target Scale
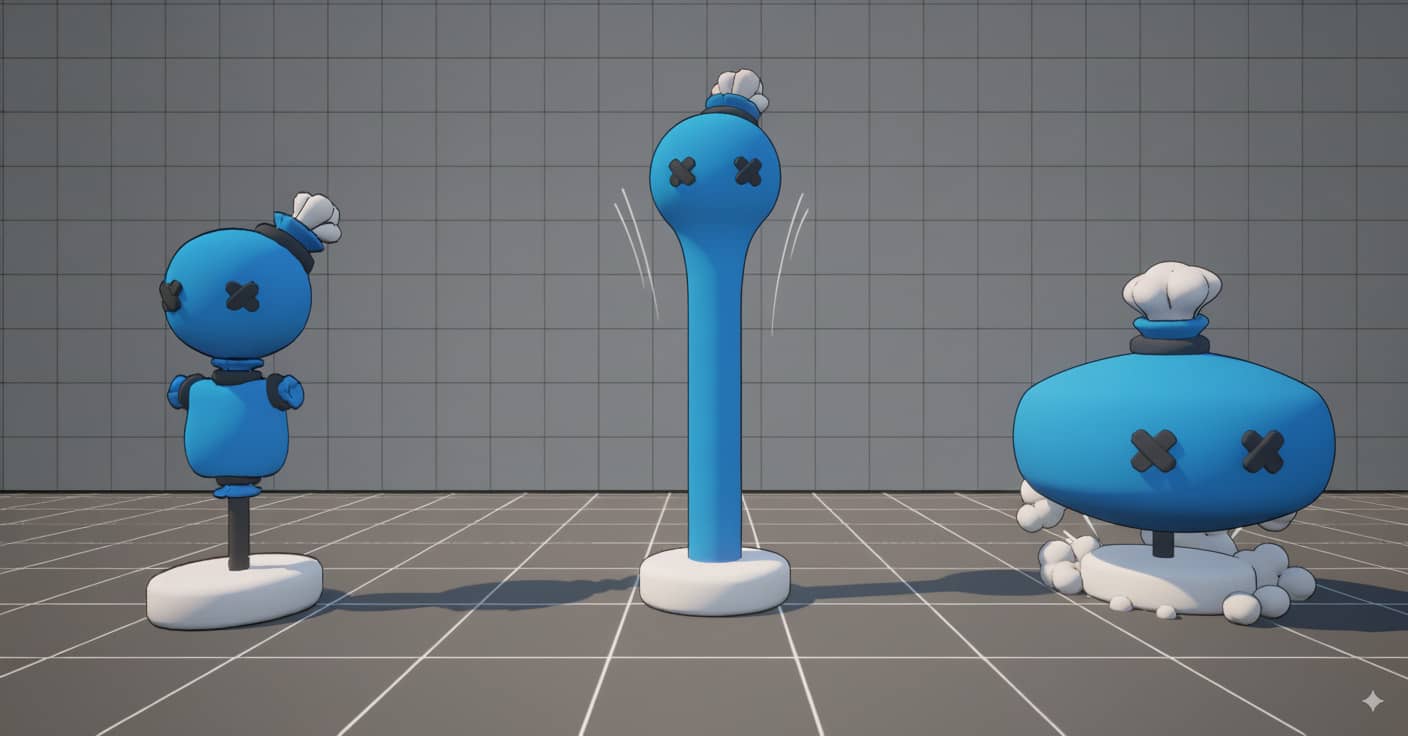
Create a SquashScale variable (Vector3) with values like (1.3, 1.3, 0.7). This defines how much the object squashes - wider in X/Y, compressed in Z.
TargetScale = OriginalScale * SquashScale
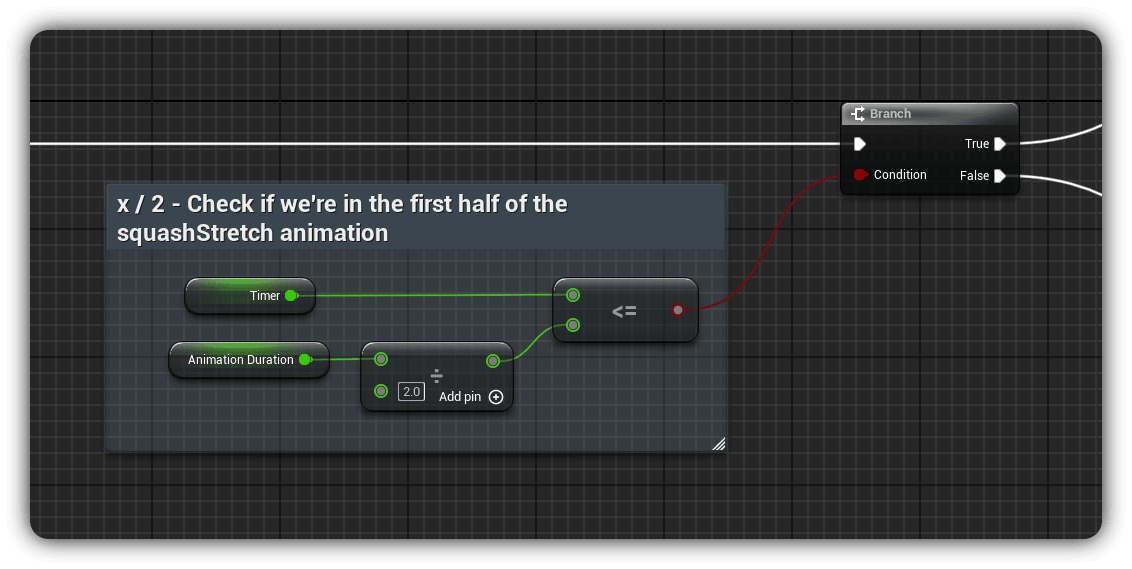
Check Animation Phase
Determine if we're in the squash phase (first half) or stretch phase (second half):
// AnimationDuration (Float): Default = 0.2 seconds
// True → Squash phase (first 0.1s)
// False → Stretch phase (second 0.1s)
Mathematical Precision
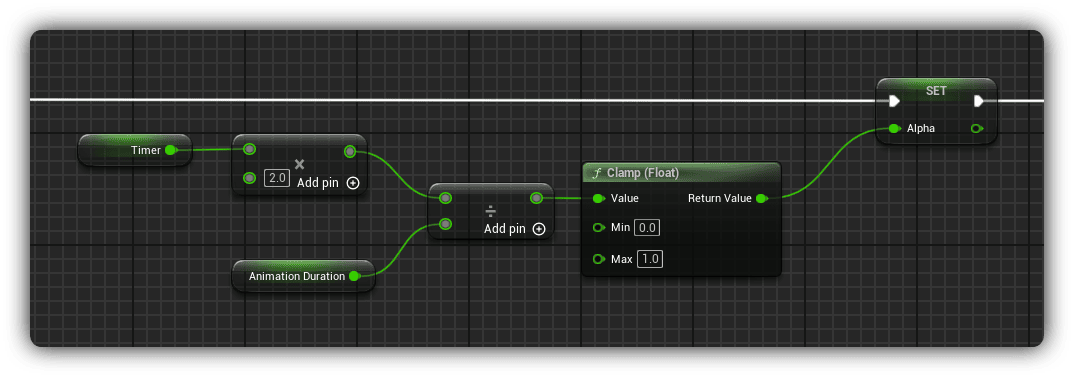
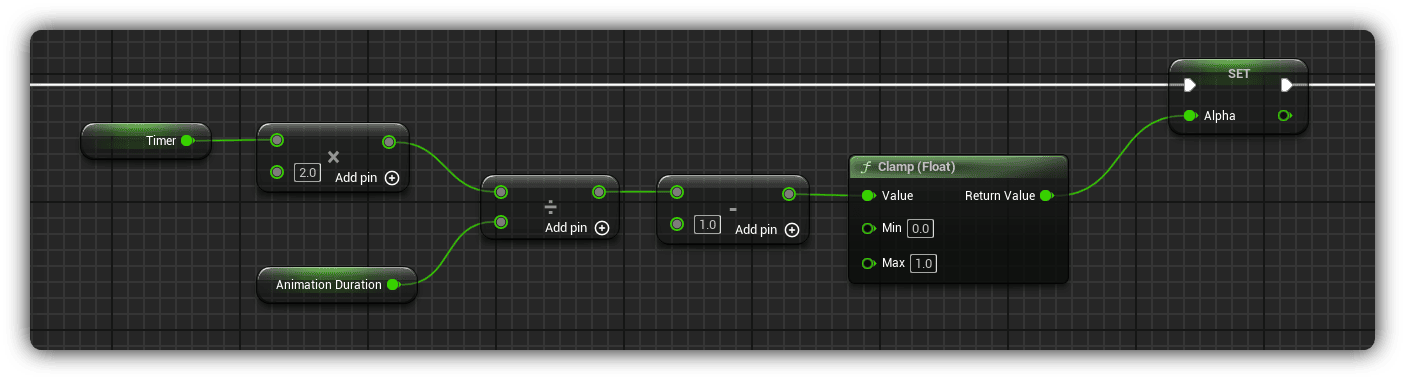
Calculate Alpha
Create a normalized alpha value (0 to 1) representing our progress through the squash phase:
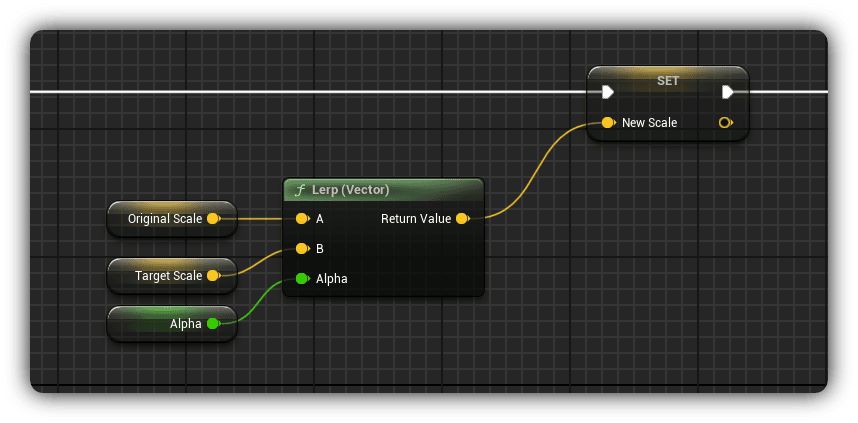
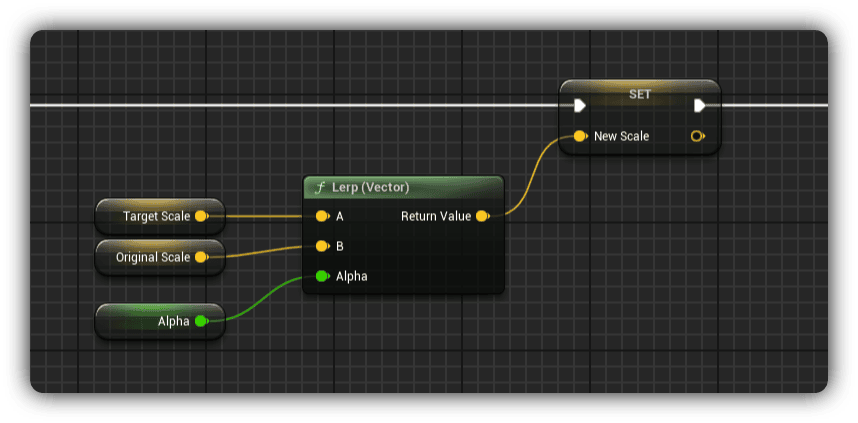
Interpolate Scale
Use linear interpolation to smoothly transition from original to squashed scale:
A = OriginalScale // Starting point
B = TargetScale // Squashed shape
Alpha = Alpha // Progress (0 to 1)
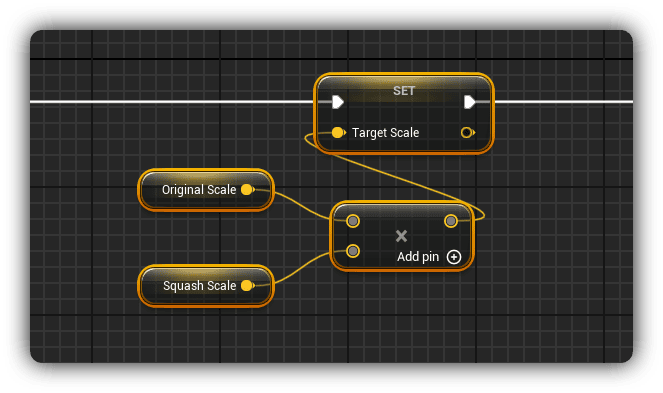
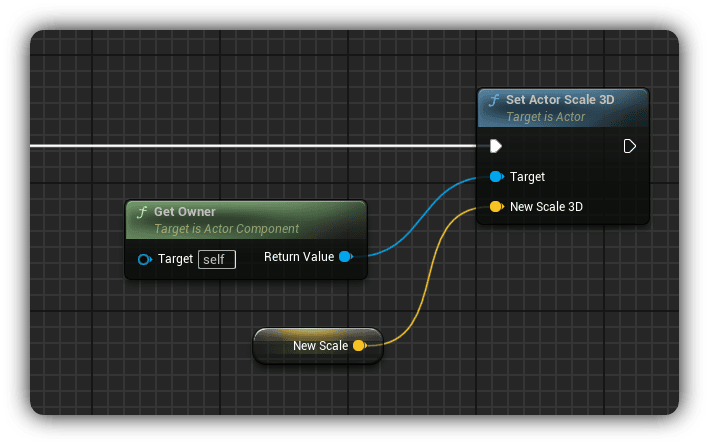
Apply Scale
Apply the calculated scale to the owning actor:
Target = Get Owner
New Scale = NewScale
Stretch Phase & Reset
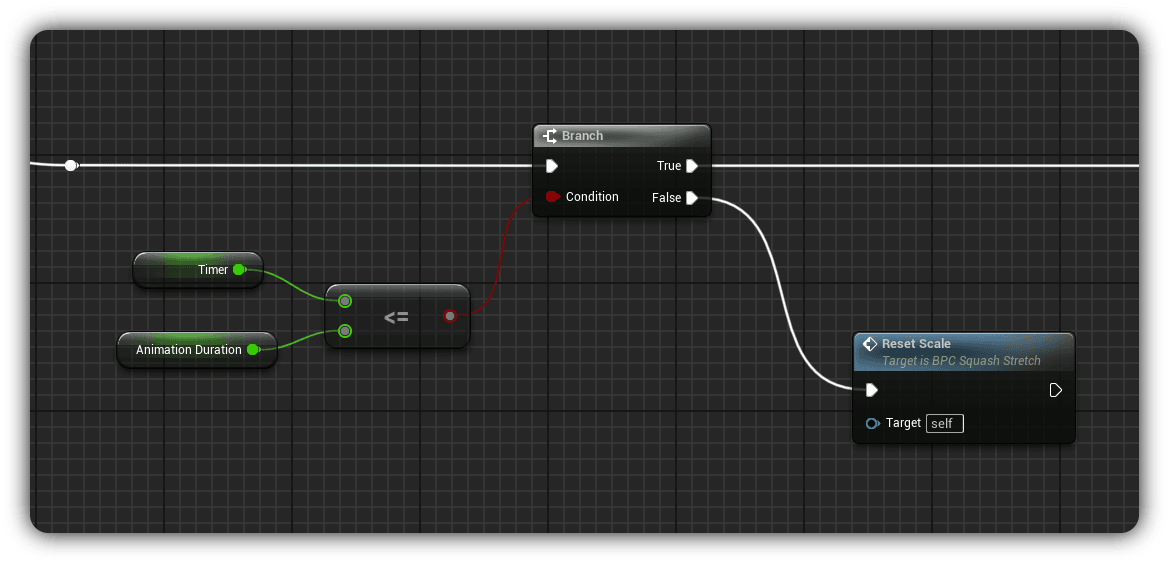
Check Animation End
Determine if the animation has completed its full cycle:
// True → Continue stretch animation (step 14)
// False → Reset animation (step 13)
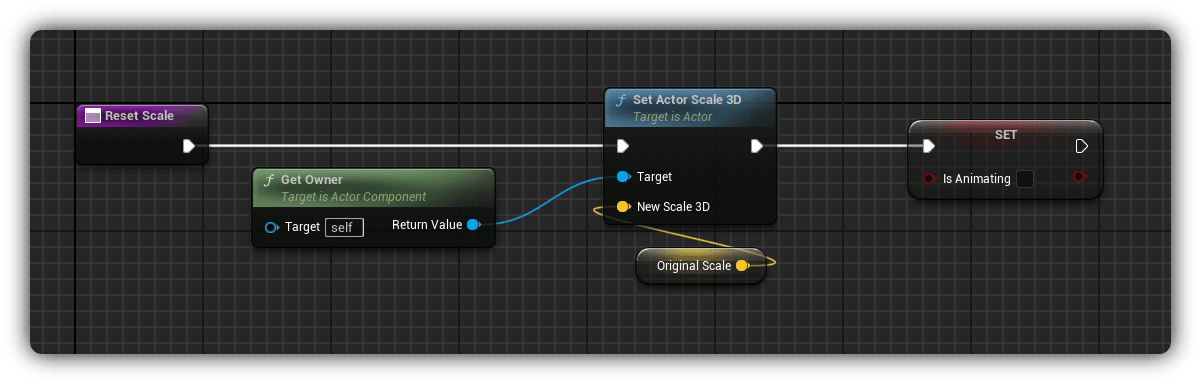
Reset Function
Create a clean reset to end the animation:
Set Actor Scale 3D → OriginalScale
Set Timer = 0
Set bIsAnimating = false
Calculate Return Alpha
For the stretch phase, calculate alpha for the return journey:
Interpolate Return
Lerp from the squashed scale back to the original scale:
A = TargetScale // Squashed (start of return)
B = OriginalScale // Normal (destination)
Alpha = Alpha // Return progress
Apply Return Scale
Apply the interpolated scale during the return phase:
Target = Get Owner
New Scale = NewScale

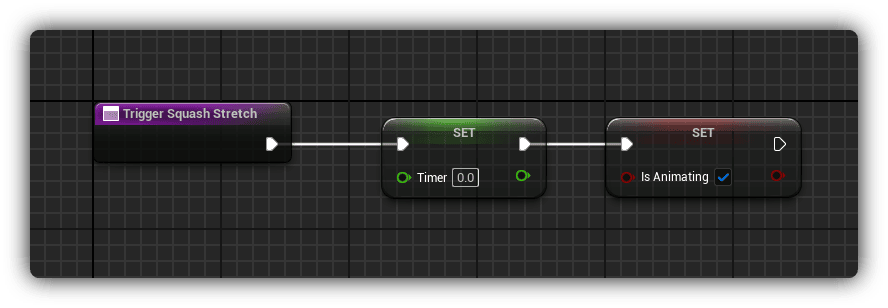
Create Trigger Function
Add a public function to trigger the animation:
Set bIsAnimating = true
Set Timer = 0
Compile & Save
Compile your blueprint and save. Your component is now ready to use across your entire project!
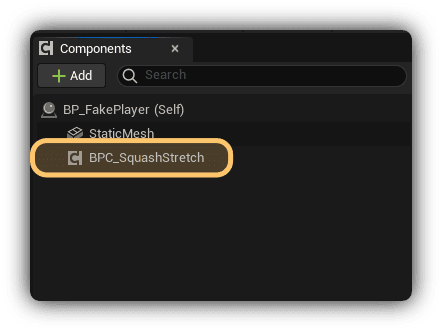
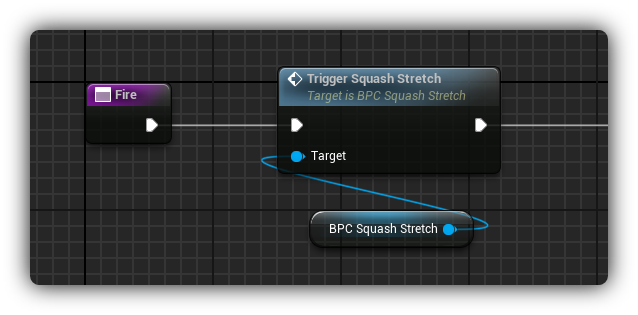
Implementation Examples
Add the component to any actor and call TriggerSquashStretch to activate:
Squash: (1.3, 1.3, 0.7) // Wider and flatter
Duration: 0.15 seconds
// Enemy Hit Reaction
Squash: (0.7, 0.7, 1.3) // Thinner and taller
Duration: 0.25 seconds
// Pickup Collection
Squash: (1.5, 1.5, 0.5) // Extreme squash
Duration: 0.3 seconds
✅ Implementation Checklist
- BPC_SquashStretch component created with all variables
- AnimateScale function implemented with branching logic
- Timer system and alpha calculations working
- Squash and stretch phases properly interpolated
- TriggerSquashStretch function ready to call
- Component tested on game objects
Where to Apply This System
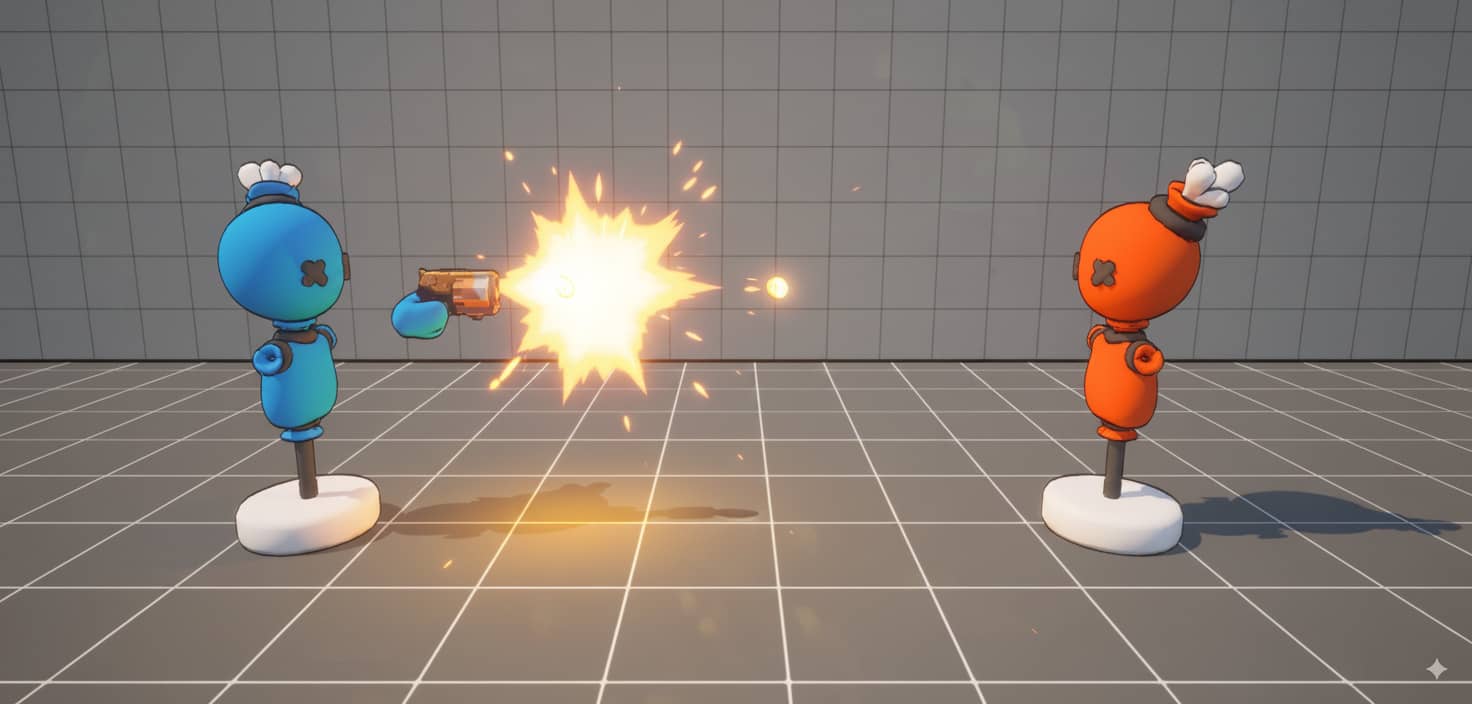
🔫 Weapons
Gun firing squash (1.3, 1.3, 0.7), reload animations, melee swings
👹 Enemies
Hit reactions (0.7, 0.7, 1.3), death squash, spawn animations
🎮 Player
Jump landing, dash moves, damage feedback
🖱️ UI Elements
Button presses, menu transitions, notification bounces
💎 Pickups
Collection squash, hover idle animation, spawn effects
🌍 Environment
Platform impacts, door slams, explosion debris
Ready to Level Up Your Game Development?
This tutorial is just the beginning. Master advanced Unreal Engine 5 techniques with our upcoming courses and free resources.
If you'd like the full project files and more reusable components like this one, you can support the work on Patreon.